Mobile deposit is a timesaving online banking feature that allows you to transfer money from a paper check into your account using only a smartphone and an internet connection. With it, you can easily deposit personal, business, cashier’s, traveler’s, and government-issued checks without the hassle of an inconvenient trip to the bank or ATM.
Here’s how to make a mobile check deposit for faster access to your funds.
1. Sign in or download a mobile banking app and check the deposit guidelines
The first thing you need to do is make sure that your financial institution or credit union accepts mobile check deposits. Most do so in their mobile banking app, but you can check your financial institution’s website or contact customer service if you’re not sure.
If your bank has mobile deposits, follow these steps:
- Download the app.
- Sign in.
- Head to the menu and look for the mobile check deposit option.
- Begin the deposit process.
If your bank account doesn’t allow mobile check deposits, consider looking for a mobile app that does offer that feature or making a deposit in person.
Next, look up your financial institution’s mobile check deposit guidelines. You’ll find important information about weekly and monthly deposit limits, including how long funds will take to appear in your account. You can usually find these guidelines in the mobile deposit feature on your financial institution’s app.
Mobile check deposit rules vary between banks and credit unions, so read the guidelines even if you’ve used other mobile banking services. In most cases, regardless of whether you’re depositing business checks or personal checks, you can prevent delays and make sure you have everything you need for the upcoming steps.
2. Endorse your check and photograph both sides

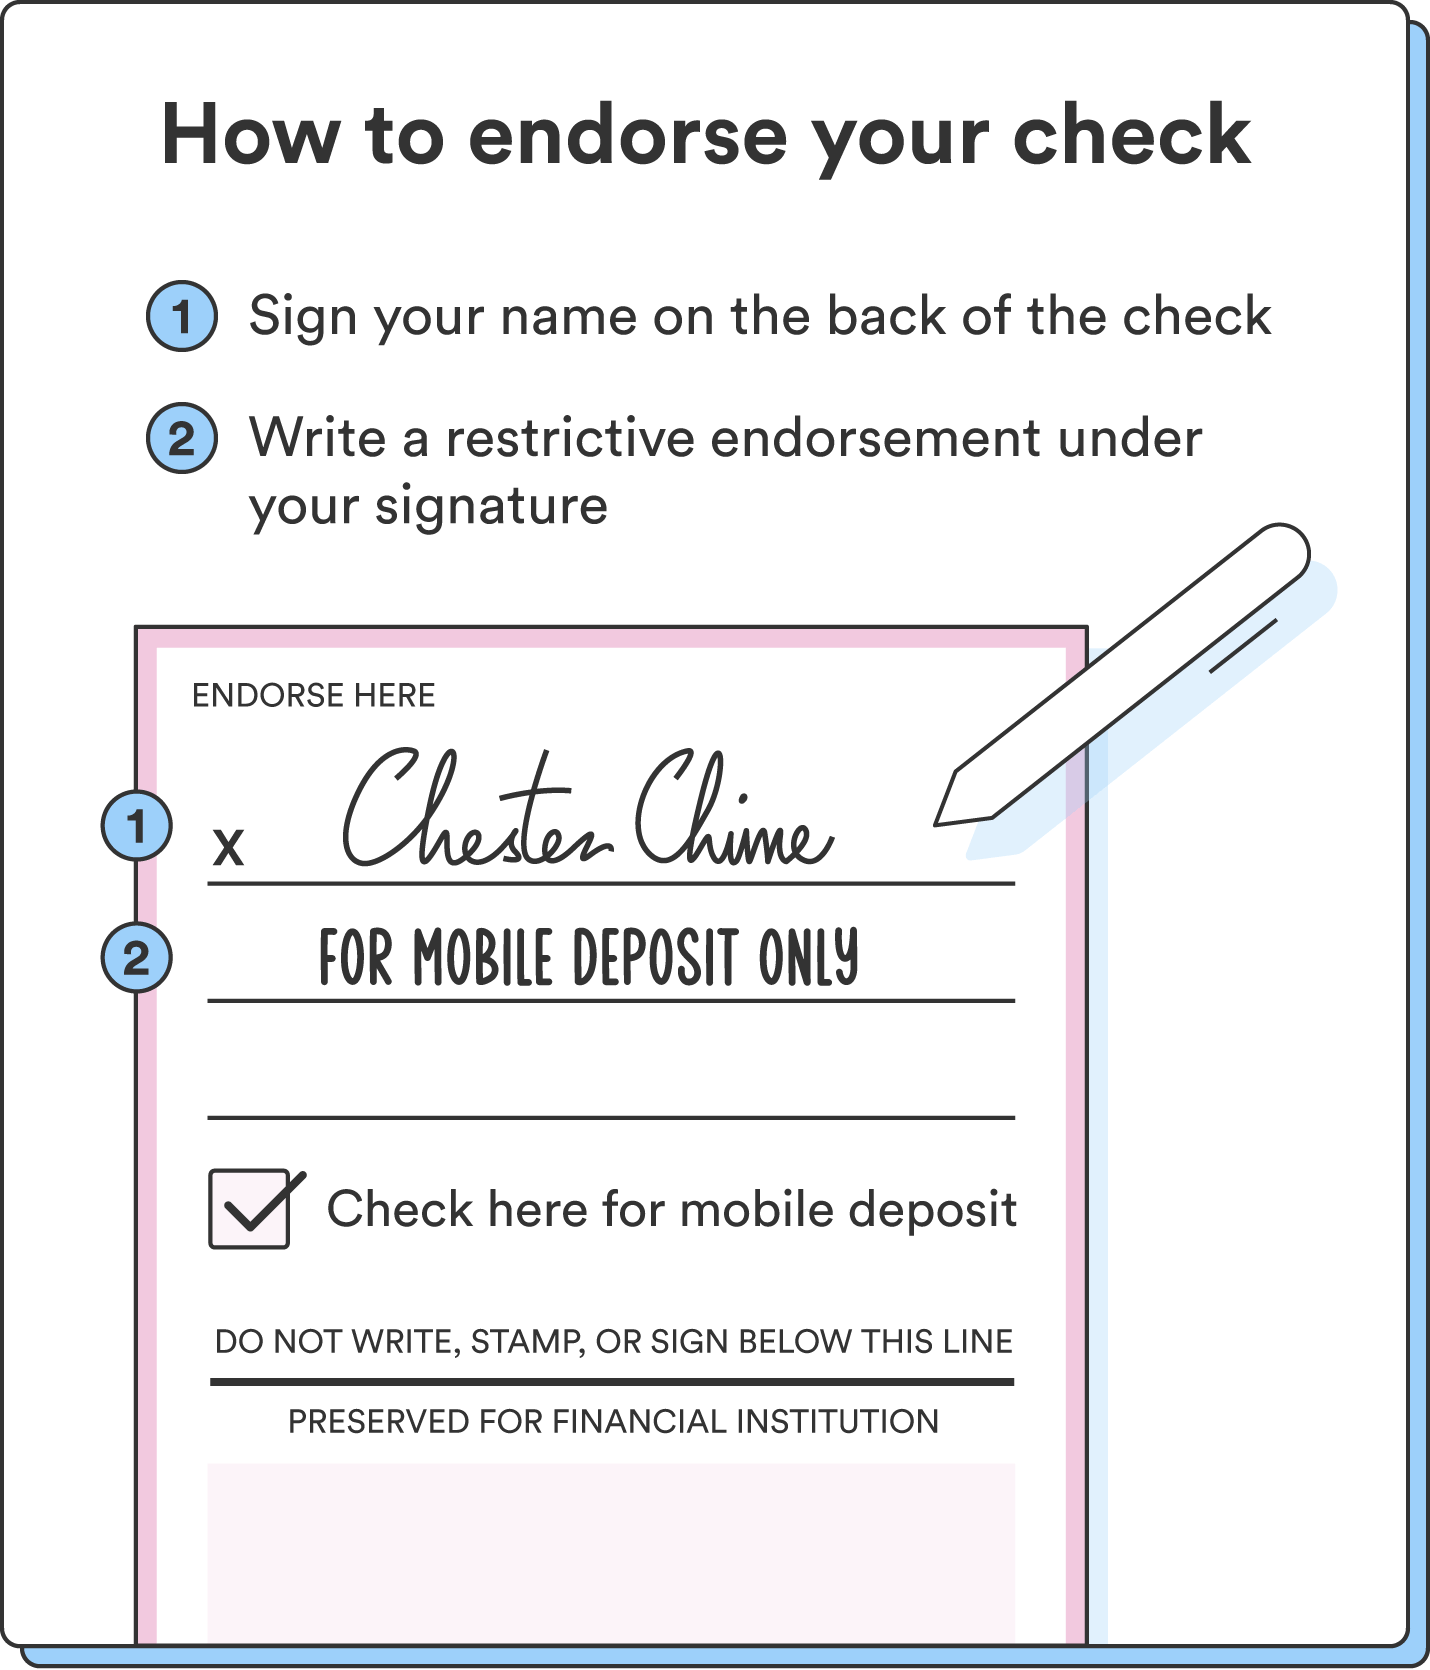
The first thing you’ll need to do is endorse the check for mobile deposit. During the endorsement process, you can verify that the information written on the check is accurate and that you’re making a mobile deposit.
The steps for a mobile check deposit endorsement include:
- Signing the back of the check: The endorsement area is usually on the back under a header that reads “Endorse check here,” along with three to five grey lines. Sign your full name in this area using black or blue ink like you would for a regular deposit.
- Adding a mobile check deposit endorsement: Unlike in-person check deposits, you need to add a restrictive endorsement under your signature for mobile check deposits. The phrasing requirements might change depending on where you bank, but it’s usually something like, “For mobile deposit only.”
Once you prep the physical copy of the check, it’s time to take a couple of pictures.
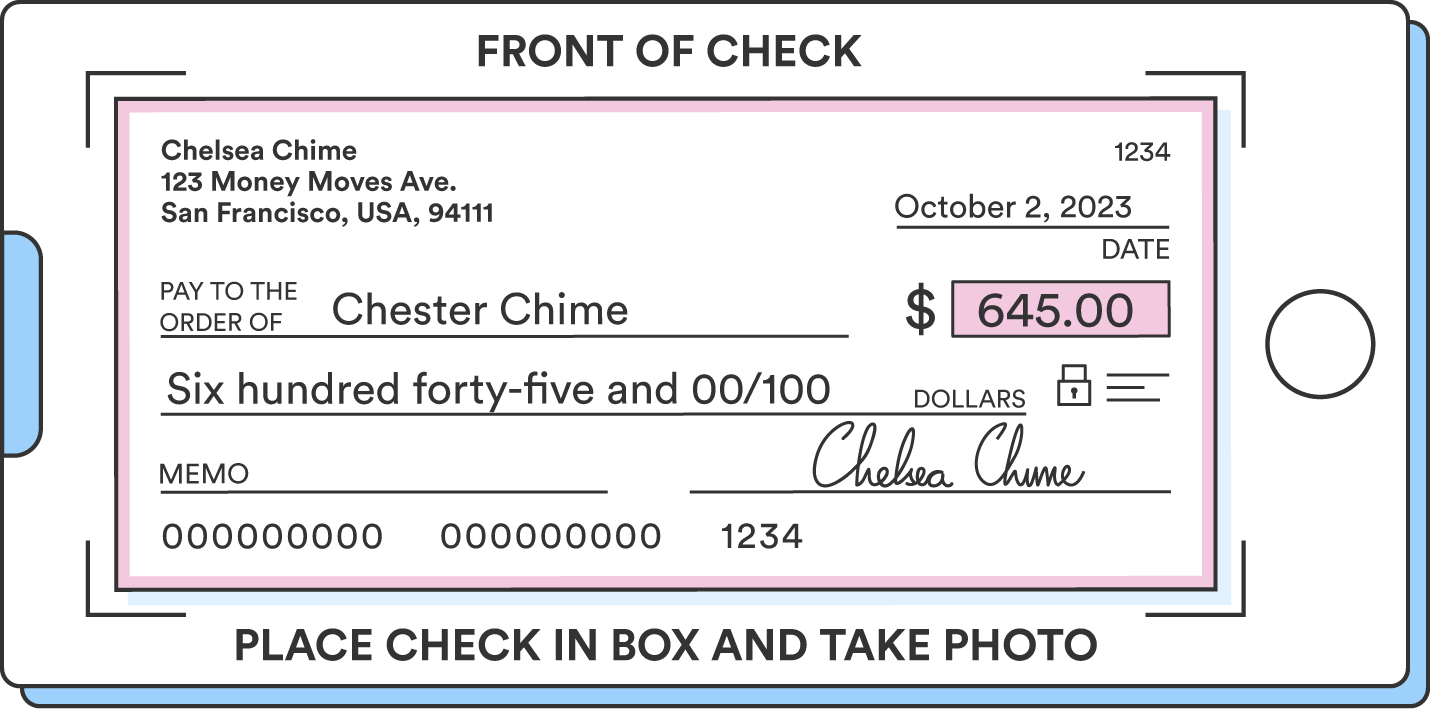
Snap a photo of the front and back of the check.
Get a clear image of both sides of the check so your bank or credit union can verify the sender’s information, the amount, and your signature. If the photos are low-quality, the Remote Deposit Capture (RDC) might have difficulty scanning the check, which can lead to processing delays.¹

If needed, retake the pictures until the information is legible and in view. Your mobile banking app should also offer features like a frame to help you line up the check or pop-up messages when the light is too dim.
3. Enter details, check for errors, and submit the deposit
After the app accepts your images and you’re confident they’re easy to read, you usually need to verify the information on the check. At this point, the app will likely ask you to enter the deposit amount and specify which account to deposit the money into. Most financial institutions will allow you to deposit the funds into your checking account or savings account.
If your app auto-fills the information, you should still double-check those details. At this stage, you should try your best to catch errors with:
- The check amount
- A restrictive endorsement
- Your account number
- Misspellings
After you upload pictures of both sides of your check and confirm all of the information is correct, all you need to do is submit your check.
Once you do, it can take a few minutes to a few business days for the funds to appear in your account. For the most part, the timeline depends on your financial institution’s fraud detection process and check-hold policies, which protect you from forms of fraud like check kiting. If you need funds fast, check your bank’s policies before starting the deposit.
4. Hold onto the check until it clears
You should hold onto your check until the funds appear in your account. That way, you’ll have proof of any discrepancy if you run into other problems later.
Once the mobile deposit goes through correctly, you can void the check and store it somewhere safe if you need to review your past transactions. You can also shred and recycle it.
Best practices for mobile check deposits
To ensure a smooth and secure mobile check deposit experience, there are a few best practices to follow. These will help you avoid common issues and make the most of your bank’s mobile deposit feature:
- Understand your bank’s mobile check deposit limits: Different financial institutions have their own limits on how much you can deposit in a given time frame.
- Find out when your funds will be available: Knowing the hold times for your deposited funds can help you manage your money more effectively.
- Keep the check until it’s been processed: Keep the check until you’re sure the funds are in your account.
- Shred the check after it has cleared: Once your deposit is confirmed, shred the check to protect your information.
Mobile check deposits made easy
Take advantage of your bank’s mobile check deposit feature to save time. Although the process can come with a learning curve, knowing how to make a mobile check deposit is worth the effort.
If you set up direct deposit with Chime, you can send recurring payments directly into your checking account without hassle. Chime Checking Accounts also allow you to make mobile check deposits easily, which comes in handy if you receive paper checks often.
Streamline your banking with mobile deposits
Using mobile check deposits can simplify your banking experience, saving you time and effort. By following the steps above, you’ll be able to deposit checks quickly and securely from the comfort of your home.
To learn more, read our full guide on mobile check deposits.
FAQs
What is a mobile check deposit?
A mobile check deposit is a feature that allows people to deposit physical checks through a mobile app using their phone camera and an internet connection.
How does Chime mobile check deposit work?
To use Chime’s mobile deposit feature, follow these steps:
- Double-check that the name on the check matches the name on your Chime Checking Account.
- Sign the back of the check.
- Download and log in to the Chime mobile app.
- Tap Move Money.
- Tap Mobile check deposit.
- Follow the mobile check deposit prompts.
- Save the paper check until the money clears.
How long will it take for my check to clear?
It depends on your financial institution. In most cases, funds will appear in your account in a few minutes to a few business days. It can sometimes take up to a week, especially if your check is flagged for review or is for a large amount.
What do I need to know before starting a mobile check deposit?
After reading your financial institution’s mobile deposit guidelines, you should be able to answer these questions and decide whether or not you want to use the service:
- Can I deposit a check with rips, smudges, or shadows?
- Do I need specific lighting to photograph the check?
- How much money can I deposit every day/week/month?
- How many checks can I deposit every day/week/month?
- What endorsement phrasing do I need to use for mobile deposit?
- Does my financial institution have unique mobile check deposit rules?


